Adobe Target - Best Practices and FAQs

Adobe Target is a personalization and A/B testing tool offered by Adobe as part of their Adobe Experience Cloud suite. It is used to optimize website and mobile apps by delivering targeted content, offers, and experiences to different segments of their audience. For more details about the Adobe Target, please visist our solutions page for Adobe Target.

We have detailed use cases implemented in Digital Lab .These use cases for Adobe target are depicted under Use Cases section on the Digital Lab. 

During the implementation for the use cases, there can be some pain points which are being addressed here with our Best Practices and Frequently Asked Questions section. In case you still have queries, please contact ECS Team


While creating a new activity under Target, the related web property from Launch needs to be configured. This is required for multi tenancy. The activity will show an error in case the web property is not added. Web Property Id can also be automatically enabled. For detailed use case, please click here
  • Login to ECS cloud.
  • Go to Adobe Launch.
  • Select the Adobe Launch property and ‘edit’ the property.
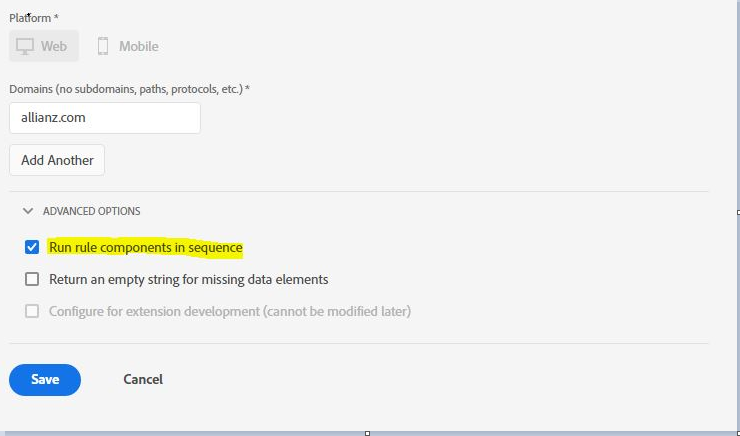
  • Choose the option ‘run role components in sequence’ under Advance option. 
  • Go to Adobe Target
  • Select the property which was updated.
  • Select the Target – Rule and you will notice the below 3 ‘Action
  • Update the actions according to following section.
  • Publish the Target Rule under ‘Dev’ environment and validate for target calls.
  • If everything looks good, please publish it under ‘prod’ environment.

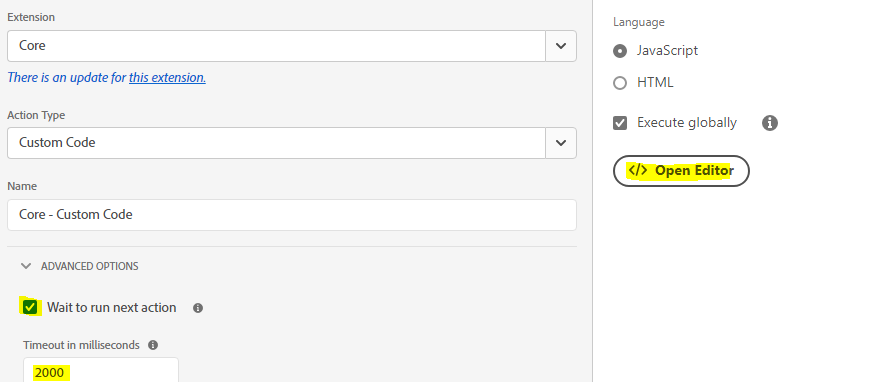
Update the action according to the following screenshot:

Actions: Core - Custom Code

Extension: Core

Extension Type: Custom Code

Name: Adobe Target v2 - Load Target

Advanced Options: Wait to run next action

Timeout in milliseconds: 2000

Language: Enable Javascript


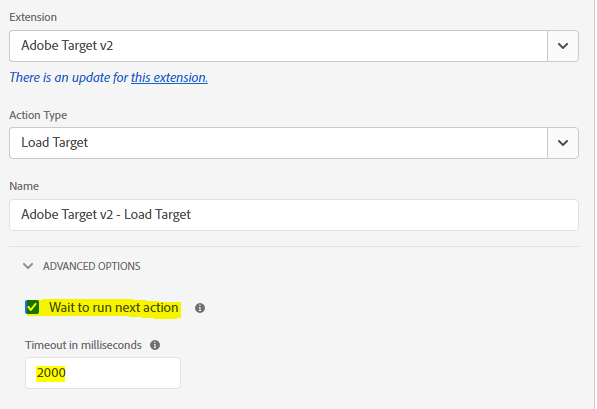
Update the action according to the following screenshot:

Actions: Adobe Target v2 - Load Target

Extension: Adobe Target - v2

Extension Type: Load Target

Name: Adobe Target v2 - Load Target

Advanced Options: Wait to run next action

Timeout in milliseconds: 2000

Language: NA


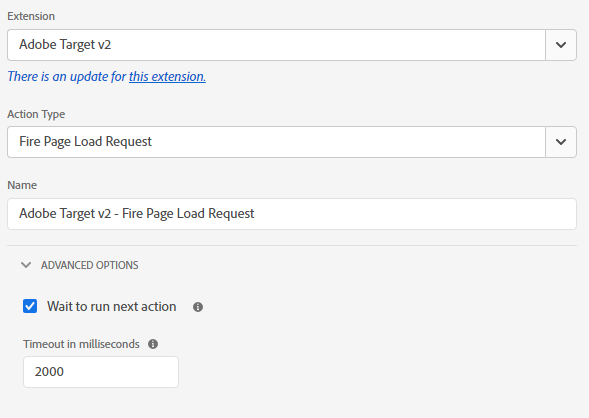
Update the action according to the following screenshot:

Actions: Adobe Target v2 - Fire Page Load Request

Extension: Adobe Target - v2

Extension Type: Fire Page Load Request

Name: Adobe Target v2 - Fire Page Load Request

Advanced Options: Wait to run next action

Timeout in milliseconds: 2000

Language: NA


The Analytics for Target (A4T) panel lets you analyze your Adobe Target activities and experiences in Analysis Workspace. It also enables you to see lift & confidence for up to 3 success metrics.
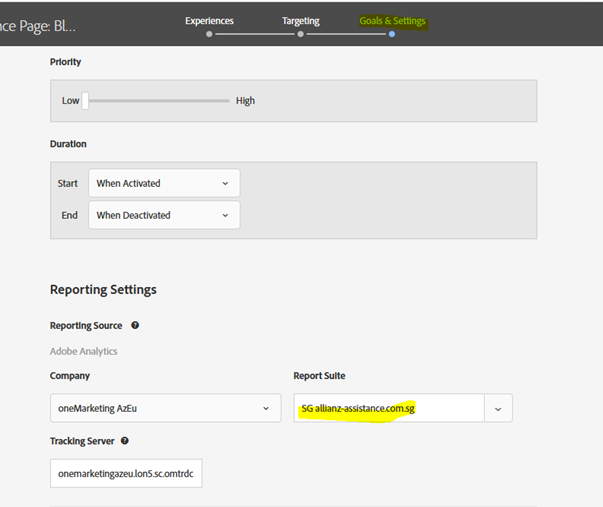
  1. First, map the correct  analytics report suite id under the Target Goals and Settings option.
  2. Once the above setup is completed. Please Save the Target activity.
  1. To access the A4T Panel, navigate to a report suite with A4T components enabled.
  2. Please click the panel icon on the far left and drag the Analytics for Target panel into your Analysis Workspace Project.
  1. Target Activity: Select from a list of Target Activities, or drag & drop an activity from the left rail.
  2. Control Experience: Select your control experience. You can change it if necessary in the drop-down list.
  3. Normalizing Experiences: Choose from Unique Visitors, Visits, or Activity Impressions.
  4. Success metrics: Select up to 3 standard (non-calculated) success events from the drop-downs, or drag & drop metrics from the left rail. Each metric will have a dedicated table and visualization in the rendered panel.
  5. Calendar Date Range: This will auto-populate based on the Activity date range from Adobe Target

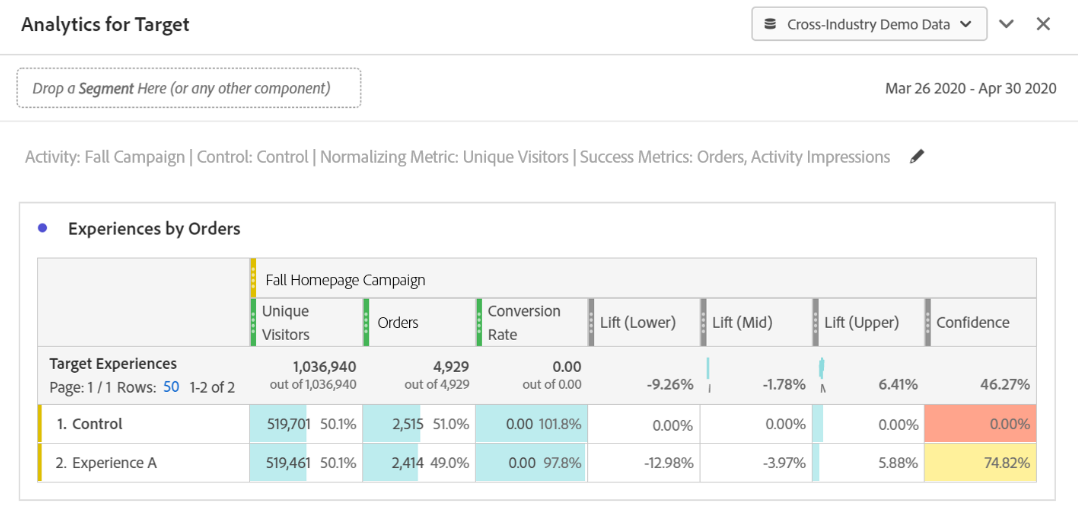
The Analytics for Target panel returns a rich set of data and visualizations to help you better understand how your Adobe Target activity and experiences are performing. At the top of the panel, a summary line is provided to remind you of the panel settings you selected. At any time, you can edit the panel by clicking the edit pencil in the top right.

Unique Visitors

Activity Impressions

Conversion Rates: Success metric/Normalizing metric. for example if 40 conversions for an experience were made and 250 vistors have seen the experience. then conversion rate would be 40/250= 16%

Lift: Compares the conversion rate for each experience against the control experience. It is delta between the experience and the controlled experience. 

Lift Lower: Represents the worst lift a variant experience could have over the control, at a 95% confidence interval.

Lift Mid: Represents the midpoint lift a variant experience could have over the control, at a 95% confidence interval.

Confidence: The confidence of an experience is a probability (denoted as a percentage) of obtaining a result as extreme as the one that is observed, given the null hypothesis is true. It means,  higher confidence means that it is less likely that the control and non-control experience have equal conversion rates.


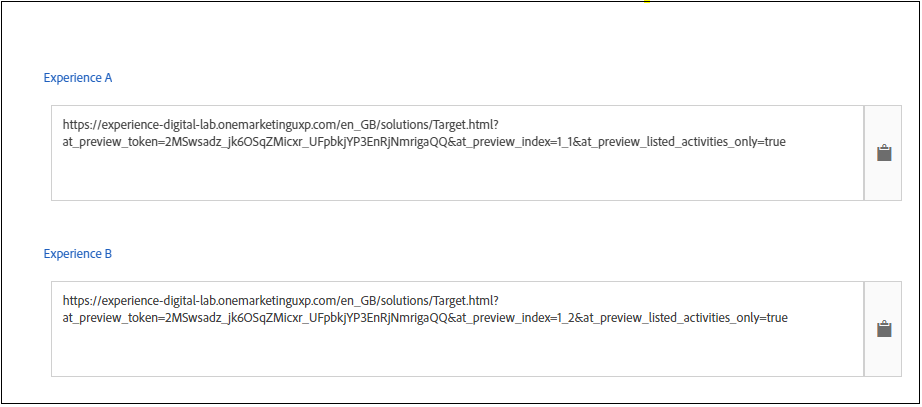
Activity QA lets you fully test your Target activities before launching them live. Use QA URLs in Adobe Target to perform easy end-to-end activity QA with preview links that never change, optional audience targeting, and QA reporting that stays segmented from live activity data.
  • Go to ECS experience cloud 
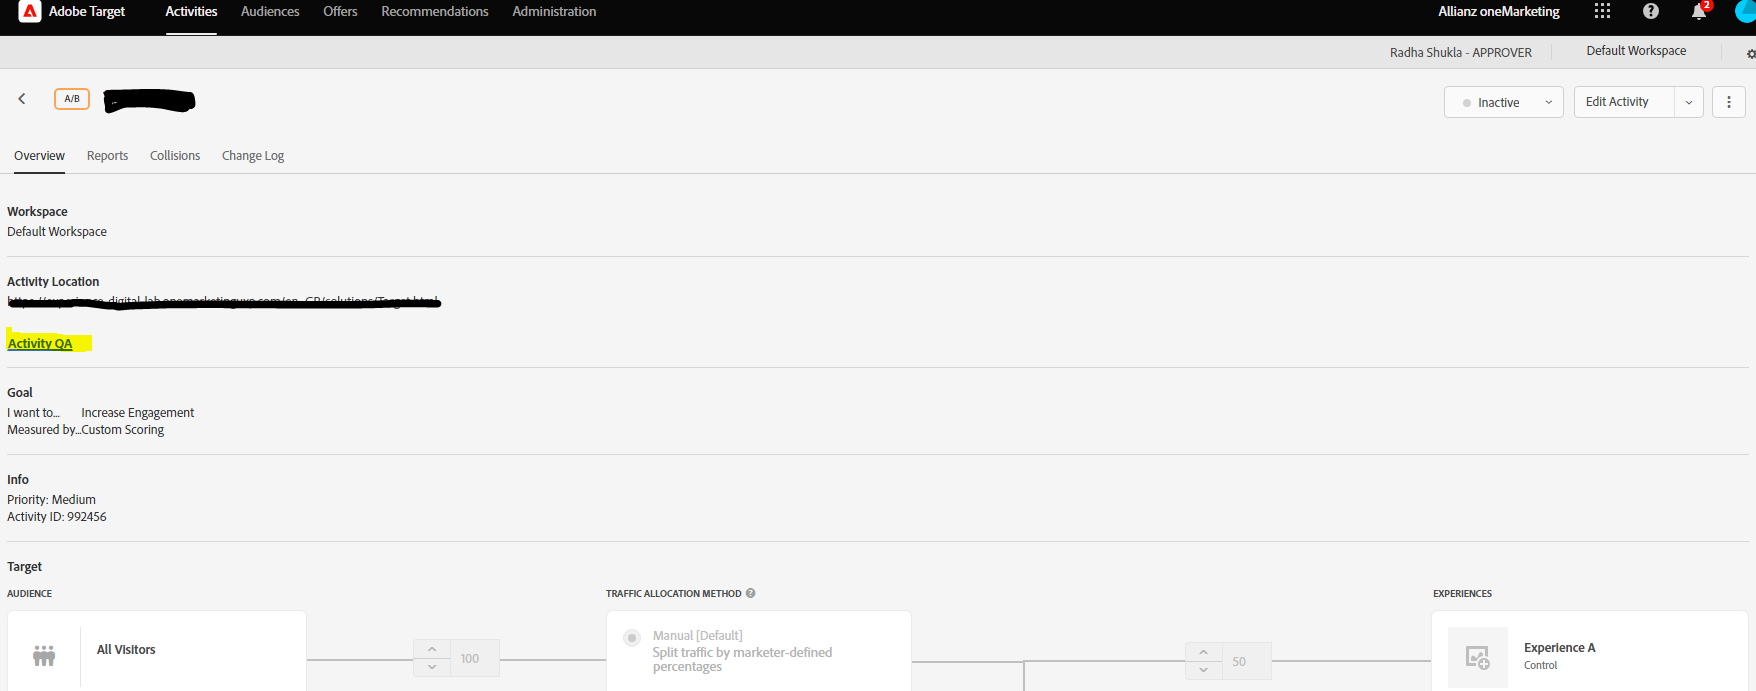
  • Select Adobe Target and click on Activities.
  • On the Activity Overview Page, click on Activity QA.
  • On the activity QA configuration, there are two options Match audience rules to see experiences and Show default content for all other activities.
  • Match audience rules to see experiences: If this setting is toggled to the “off” position, clicking the links show you the experiences regardless of whether you qualify or not. If it is enabled, then the user using the link should also qualify for the experience. 
  • Show default content for all other activities:  This option is toggled to the “on” position, default content is shown for all other activities.
  • Save your changes and share the links for testing.

Adobe Target Visual Experience extesion is a plug-in for Google Chrome browser which lets you load websites reliably within the Adobe Target Visual Experience Composer (VEC) to rapidly author and QA web experiences. Some websites do not load in VEC  due to strict policies and Target Javascript not loading. The VEC Helper browser extension for Chrome solves site-loading issues for which customers now rely on the Target and helps in website loading properly in Adobe Target VEC. 

Some benifits of using the extension :

  • All iframe-busting headers, such as X-Frame-Options and Content-Security-Policy, are implicitly removed from the website. There is no need to create complicated Requestly rules.

  • If a webpage does not yet contain the Target at.js library, it can be used to inject the library so you can author experiences for the website. You can then create activities and QA them using preview links.

    So in short, this supports creating activities in Adobe Target which will be difficult to test and QA in case the extension is missing. 

The Adobe Target Visual Experience Composer (VEC) can be downloaded from the Google Chrome Extensions list and then configured.
  • Search for Adobe Target VEC Helper or navigate to Chrome Extension Link
  • Click on Add To Chrome.
  • Check in your Chrome extensions if it is now available.
vec-extension-chrome
  • Go to ECS cloud  → Adobe Target.
  • Open your activity/Create a new activity and edit on VEC.
  • To use the extension, click the VEC Helper browser extension icon  VEC Helper icon  in your Chrome browser’s toolbar.
  • The extension pops up a message to inject library to enable authoring.
  • Slide the Cookies toggle to the “on” position to automatically add the SameSite=None attribute browser fix
vec-extension-inject-js
vec-extension-slide-cookie
  • Check if VEC extension is enabled for chrome.
  • Login to ECS Experience Cloud
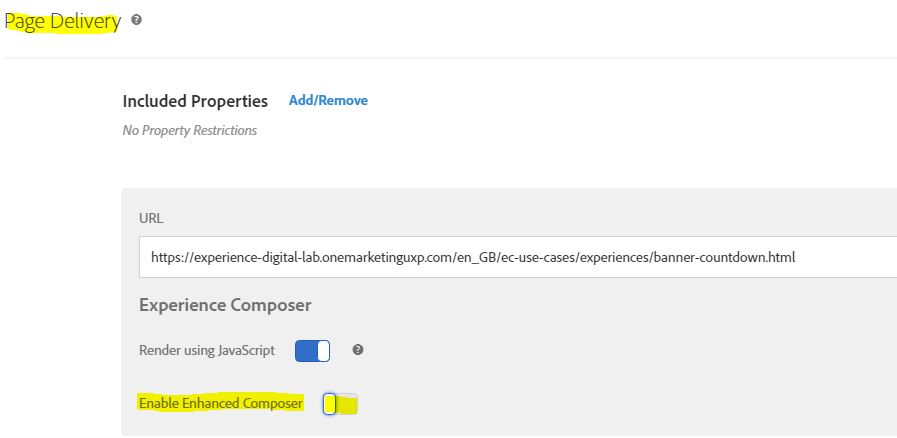
  • Under Experience section, please click on Settings à   Page Delivery à Enable Enhanced Composer
page-delivery
  • Toggle off Enable Enhanced Composer to render UI elements to inside Target. 
enable-enhance-composer